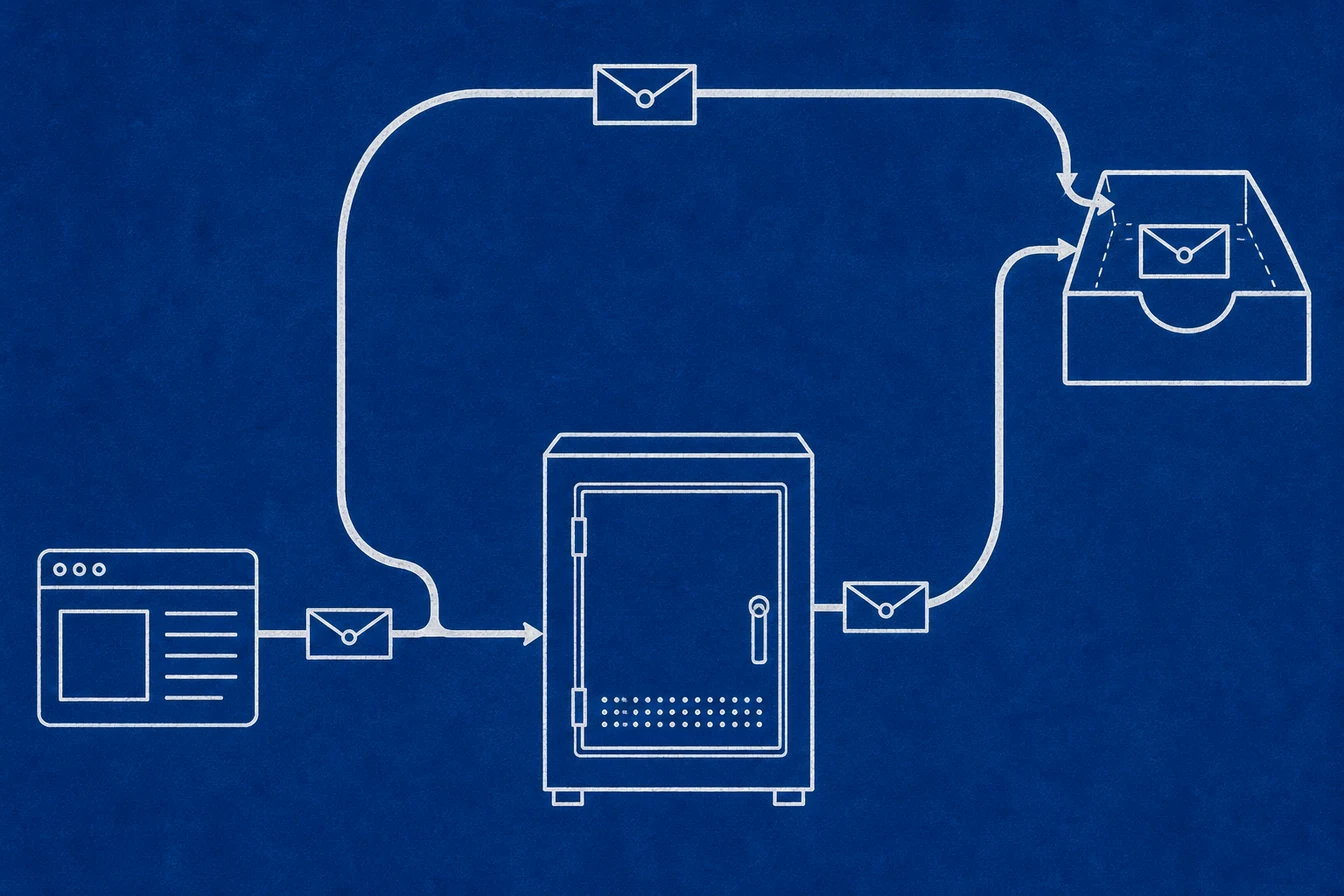
The Meta Conversions API Gateway is a managed server layer that takes the web events your Meta Pixel already fires and routes a server copy to Meta through the Conversions API. The browser Pixel keeps firing as normal. The Gateway adds a second, server-side delivery for the same event, and Meta joins the two copies into one when they share the same event name and event ID. You configure the connection instead of writing the API integration, and a host runs the Gateway instance that processes the requests.
That first paragraph answers what the Gateway is. The sentence that decides whether it fits a client is the next one. The Gateway makes event delivery more reliable. It does not make the event more truthful. It transports an existing web event through a cleaner path, with better matching and automatic deduplication. It does not confirm that a payment actually went through, that the buyer was unique, or that the business had permission to send the data. Reliability and truth are different problems, and the Gateway only solves the first one.
I run tracking implementations for clients and built Advanced Tracking Academy around the server containers I deploy in production. This guide covers how the Conversions API Gateway works, what it costs to run, how to set it up, and which tracking problems it leaves for something else to solve.
What the Conversions API Gateway is, and how it works
The Gateway is one implementation path for the Conversions API. Your Meta Pixel stays the source of the web event. When a visitor triggers an event such as Lead or Purchase, the browser sends its normal Pixel request, and the same event data is also routed to the Gateway. The Gateway sends a server copy to Meta. Meta matches the browser copy and the server copy when they share the same event name and event ID, and counts one event instead of two. The Gateway can attach customer information parameters, and it can route requests through a first-party subdomain so the call reads as first-party traffic to the browser.
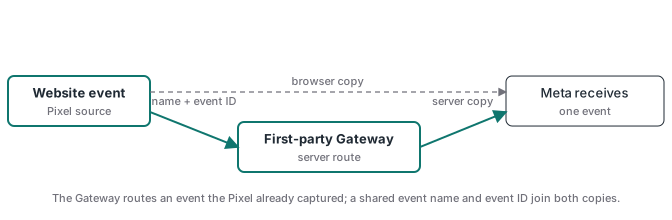
The advantage over a hand-built Conversions API integration is that you do not write each request, maintain an access token in custom code, or build the deduplication logic by hand. The Gateway observes the Pixel events you allow and handles that delivery path. The trade-off is that the Gateway only sends to Meta, and its controls are basic: you can turn an event on or off, and allow or block a domain. What it does not give you is the per-occurrence conditional logic, free payload transformation, or validation against your business systems that a custom Conversions API integration or a server-side GTM container allows. For the wider protocol, the payload fields, and how matching works, the Facebook Conversions API guide covers those pieces separately.
Why the Gateway exists: the browser Pixel keeps losing signal
The browser Pixel is not a complete record anymore. Safari’s Intelligent Tracking Prevention shortens the first-party cookies the Pixel relies on. Firefox blocks known tracking scripts. Ad blockers strip the Pixel on a meaningful share of desktop browsers. Each of those is a web-browser problem, and each can remove events or identifiers before they reach the ad platforms, which is how conversions fall out of attribution.
A separate change, Apple’s App Tracking Transparency after iOS 14.5, reduced the identifiers mobile apps could pass. That is an app and device-permission problem, and a web Conversions API Gateway does not recover the identifiers a user declined to share there. What the Gateway can help with is the web side: when the Pixel still fires, sending the event through a first-party server path can recover some of what the browser lost, because the request to Meta no longer travels through a third-party domain that blockers target. The recovery has a ceiling. If the Pixel script never loads, no event is captured, and the Gateway has nothing to route. A purchase sent from your backend, such as a processor webhook, is the only path that does not depend on the browser firing at all. Meta scores the result as Event Match Quality, a 0 to 10 rating of how confidently your server events can be matched to real Meta accounts. More reliable server-side data, especially hashed email and phone captured at the moment of conversion, can raise that score. The Gateway is one way to get those server events flowing without standing up a full tagging container, and the server-side tracking guide explains the data-decay problem in more depth.
What you need before setting up a CAPI Gateway
The Gateway depends on web events the Pixel already sends, so a working Pixel is the first requirement. It cannot discover a Purchase event the site never fires, and it cannot fix a wrong value or currency at the source. Before adding infrastructure, confirm the browser event names and parameters.
You also need access to the Business Manager and the dataset your Pixel reports into, access to the site’s DNS if you want a first-party subdomain, and a hosting plan in a region that makes sense for your visitors. Decide who owns the Gateway after handoff. An agency may run several data sources from one hub, while a client-owned setup is usually cleaner in a separate Gateway with the client’s admin email. Finally, audit the site for any existing Conversions API integration. An old plugin or server tag left running creates a third event outside the browser and Gateway pair.
Use this preflight list before opening the setup screen:
- The Meta Pixel fires the intended standard or custom events.
valueandcurrencyare correct on revenue events.- The operator has access to the Business Manager and dataset.
- The admin email and long-term owner are decided.
- DNS access is available if you plan to use a custom subdomain.
- Any existing Conversions API plugin, direct integration, or server tag is documented.
- Consent behavior has been tested for accepted and declined states.
How to set up the Gateway on a managed host
The steps below follow the managed-host path, with Stape as the example because this site partners with Stape and knows that flow directly. If you deploy the Gateway on your own cloud instead, the hosting steps differ, so follow Meta’s deployment guide for that path and keep the connection and validation steps the same.
The managed setup is short, but the work is more than clicking Connect. You create the Gateway, choose its owner, region, and plan, and accept the hub invitation sent to the admin email. You add the Meta data source through the Gateway hub. Once events arrive, you choose which customer information parameters may be shared through automatic advanced matching. A first-party subdomain is recommended rather than required, because the host gives you a default URL that works out of the box, and adding your own subdomain makes the request read as first-party traffic and helps it avoid some blocking. Then control the event set: let the Gateway detect Pixel events, and disable any event that should not travel through the server route.
- Create the Gateway. Enter a descriptive name, a unique admin email, and the server location closest to your main audience.
- Activate the host. Select the plan, wait until the Gateway shows a running state, and accept the hub invitation.
- Add the data source. Connect the Business Manager and select the intended dataset or Pixel.
- Review matching parameters. Enable automatic advanced matching only after deciding which customer fields the business may share.
- Add a custom domain (recommended). The default URL works, but a first-party subdomain makes the request read as first-party traffic and helps it avoid some blocking. Create the supplied record and complete verification in the hub.
- Control the event set. Let the Gateway detect Pixel events, then disable any event that should not be sent through the server route.
- Run a real validation. Trigger a lead or a low-risk purchase, then check the browser request, the Gateway receipt, the server delivery, and the deduplication result.
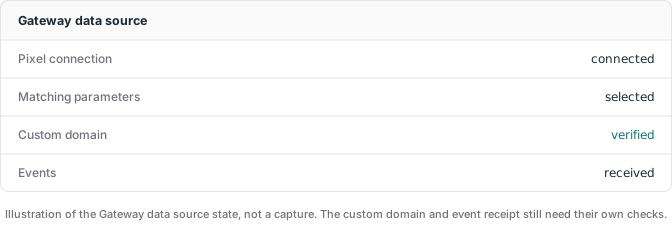
The exact labels in the hub change over time, so follow the live screen rather than an old screenshot. The steps above describe what each part of the setup is for, which stays stable even when the button names move.
How to test whether the Gateway is working
Test the chain in layers, not by a single green status. Start in the browser network panel and confirm the expected event reaches the configured Gateway URL. Check the Gateway hub for the event name and receipt state. In Events Manager, verify that normal production traffic produces browser and server deliveries that deduplicate into one event. A working DNS record says nothing about purchase value, and an event visible in the hub may still carry weak customer information or a duplicate from an older integration.
| Check | Where to inspect | What a pass looks like |
|---|---|---|
| Pixel source | Browser and Pixel tooling | Correct event name, value, currency, and identifiers |
| Gateway route | Browser network panel | Request reaches the first-party Gateway URL |
| Hub receipt | Gateway data source view | Expected event appears and the domain is allowed |
| Server delivery | Events Manager | Browser and server channels are visible on normal traffic |
| Deduplication | Events Manager diagnostics | One real action is counted once, with no extra copy |
| Business truth | CRM, order system, or processor | Tracked outcomes reconcile with the system that records the result |
A pass on the first five rows without the sixth is a setup that looks done and is not.
How much the Conversions API Gateway costs
Meta charges nothing for the Gateway software or for receiving Conversions API events. You can deploy the Gateway into your own supported cloud environment, in which case the recurring bill is the compute and related resources you provision. That is self-hosting, not free infrastructure. Managed hosting is the other route, and it trades cloud administration for a fixed plan and support.
As of August 2026, managed hosting on Stape is about $10 per month per Pixel, or $100 billed yearly, which works out to roughly $8.33 per month, with up to 10 million events per month per Pixel. An unlimited tier is available for agencies that run many Pixels from one account, and a short free trial lets you test the flow before committing. Check the live pricing page before quoting a client, because prices and event limits can change. The rest of the cost is setup time, validation, and future ownership. The cheapest infrastructure is still expensive if nobody knows which account owns the hub or an old integration keeps doubling purchases.
For an agency, price the work around the result you can verify. Connecting a Pixel is quick. Auditing event quality, removing duplicate paths, documenting access, and reconciling a real outcome are the parts the client is paying you to get right.
Partner note: Advanced Tracking Academy is a Stape Level 2 partner for professional implementations. If Stape is the host you choose, our partner link and the code MRPV20 take 20 percent off the first three months. The site callout below carries the configured link.
What the Gateway does not fix
The clearest way to see what the Gateway leaves unchanged is to set its effects side by side with its limits.
| The Gateway can | The Gateway cannot |
|---|---|
| Route an existing Pixel event through a server path | Confirm that a real payment went through |
| Deduplicate the browser and server copies by event name and event ID | Stop a duplicate, a test, or a bot that fired the Pixel |
| Improve matching with hashed customer data | Grant consent the visitor never gave |
| Recover some Pixel events through a first-party server path | Send the same event to Google Ads, GA4, or TikTok |
| Self-update when Meta changes the API | Replace backend logic such as webhook validation |
If the Pixel fires Purchase on a confirmation page before the payment is captured, the Gateway routes that premature event more reliably. It is still premature. If consent is declined, sending the request through a server does not create permission to share customer data. If a blocker stops the source event from reaching the Gateway input, the server cannot route an event it never received. And if the business advertises on several platforms, the Meta Gateway does not fan the same event out to them.
The purchase case is covered end to end in the Stripe conversion tracking guide. It shows why a backend confirmation is stronger than a page-load event, regardless of how well that page-load event is transported.
Is the Conversions API Gateway right for your stack?
Choose the Gateway when Meta event delivery is the narrow problem, the Pixel source is already sound, and a fast managed setup matters more than custom logic. It fits an advertiser focused on Meta, or an agency that wants centralized data-source management without building a direct Conversions API integration for every account.
Choose a server-side GTM container when the same confirmed event must reach several platforms, when field-level control matters, or when the flow needs backend logic such as webhook validation. Some teams begin with the Gateway and add a container later, which is workable as long as you document the event owners before both systems send Meta events at once. The Gateway versus server-side GTM comparison has the side-by-side decision table, and the Meta Conversions API with GTM guide walks through the container path.
If the server container is the better fit, the ATA media buyer library ships prebuilt client and server GTM containers with deduplication and webhook-validated purchase tracking. Import the container, follow the walkthrough, and keep the setup in accounts you control.